Certificate Issuing Overview
This page will walk through the process of issuing a code signing certificate from start to finish as an entry point to understanding how Fulcio works.
1 — Certificate request input
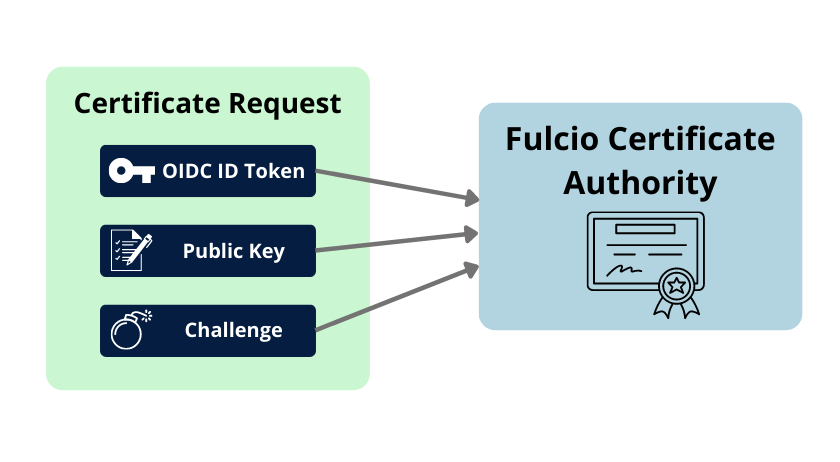
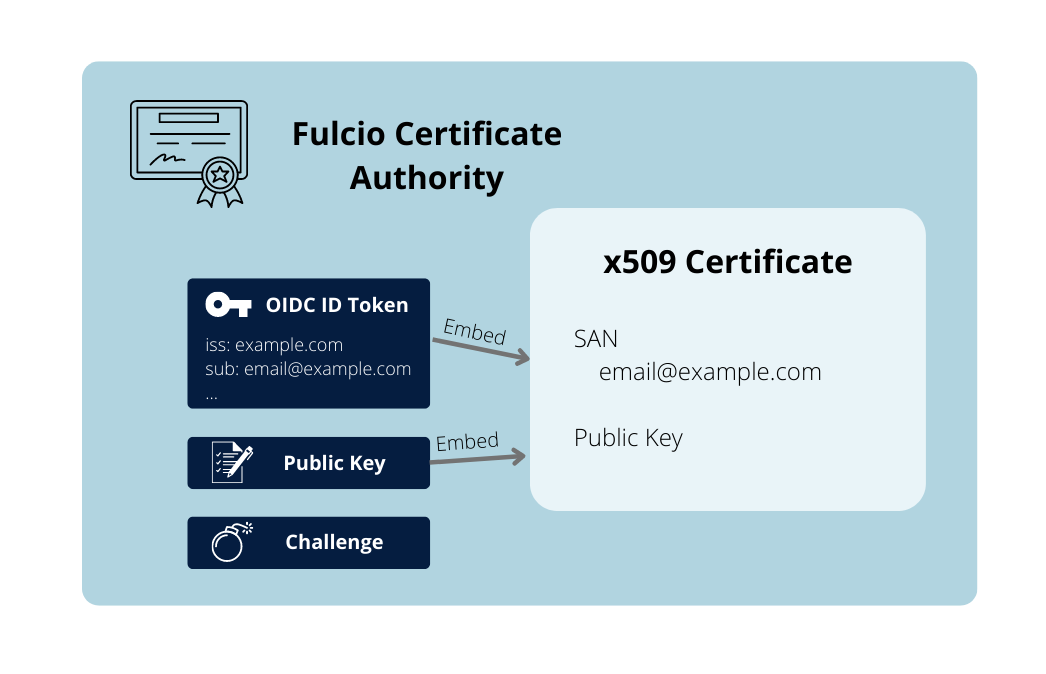
As a first step, the client submits a certificate request to Fulcio. This certificate request contains the following:
- An OpenID Connect (OIDC) identity token. This is a signed JWT containing information about the principal (identity of the client), the issuer (who issued the identity token - Google, Microsoft, GitHub, etc.) and additional metadata such as expiration. The principal identity can either be a maintainer identity in the form of an email, or a workload identity.
- The public key. This is the public portion of a cryptographic key pair generated by the client. The public key will be embedded in the issued X.509 certificate.
- A signed challenge. This challenge proves the client is in possession of the private
key that corresponds to the public key provided. The challenge is created by
signing the subject (
sub) of the OIDC identity token. - Alternatively, instead of a public key and signed challenge, a client can provide a certificate signing request (CSR), which also provides a proof of possession and the public key.
See the service definition for more details.
2 — Authentication
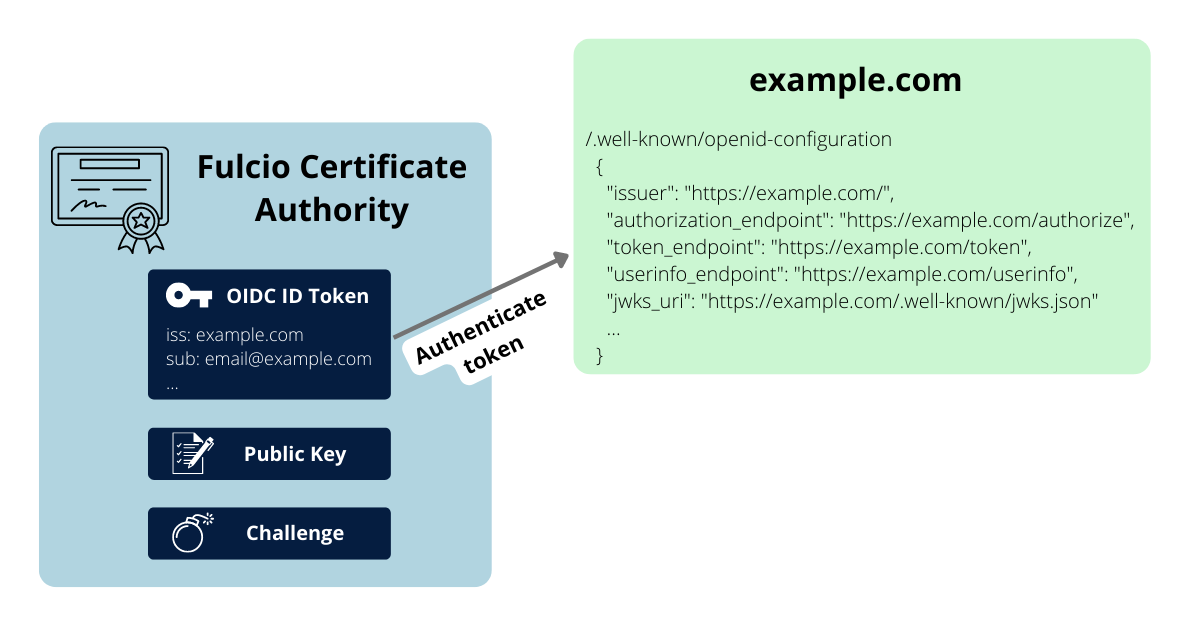
Authenticating the OIDC ID token begins the processing of the certificate request.
To authenticate the token, Fulcio must:
- Use the issuer claim from the token to find the issuer’s OIDC discovery endpoint
- Download the issuer’s signing keys from the discovery endpoint
- Verify the ID token signature
3 — Verifying the challenge
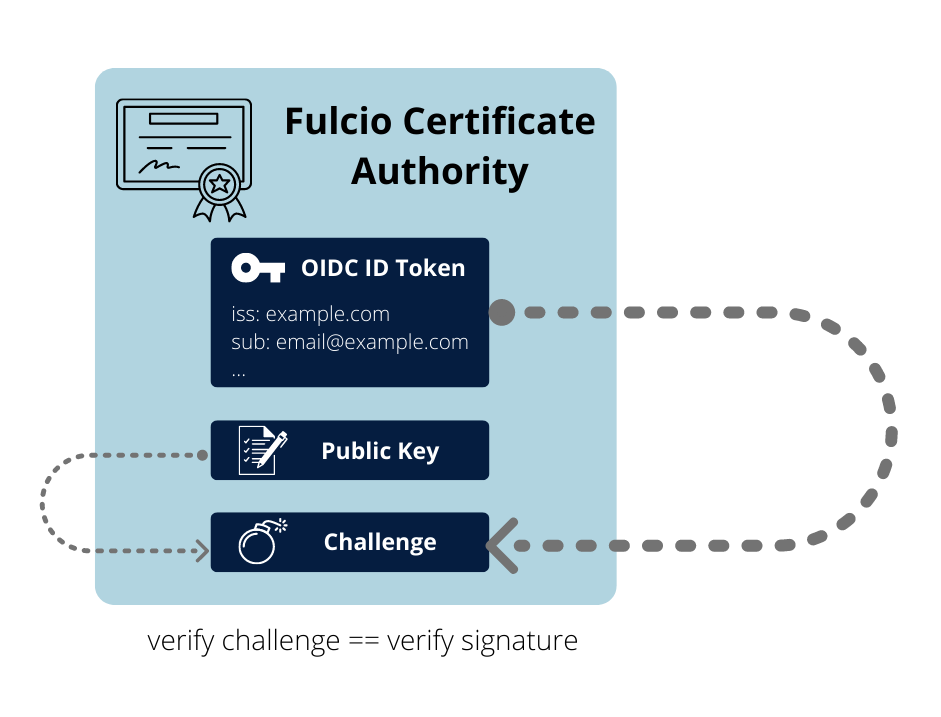
Once the client has been authenticated, the next step is to verify the client
is in possession of the private key of the public key they’ve submitted. To do
this, Fulcio verifies the signed challenge or CSR. For a signed challenge, this is
a signature of the sub claim. For challenge and CSR are verified using the provided public key.
4 — Constructing a certificate
The client is now authenticated and has proved possession of the private key. Fulcio now can issue a code signing certificate for the identity from the ID token.
At a high level, this process involves:
- Embedding the provided public key in the certificate
- Setting the certificate’s subject alternative name (who the certificate is issued for) to match the subject from the OIDC ID token. This could be an email, SPIFFE ID, or GitHub Actions workflow identity.
- Including the OIDC ID token issuer in a custom field in the certificate
- Setting various X.509 extensions depending on the metadata in the OIDC ID token claims (e.g GitHub Actions workflow information)
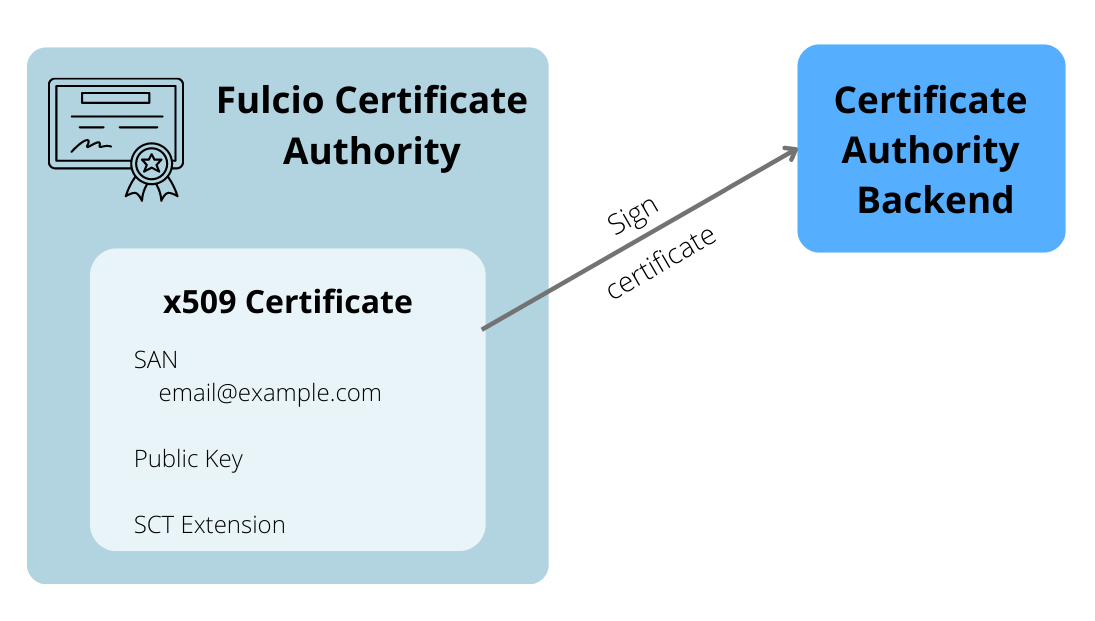
5 — Signing the certificate

The code signing certificate is now populated, but needs to be signed by the certificate authority. This will form a chain of trust from the issued certificate to the certificate authority root certificate.
Fulcio supports several signing backends to sign certificates:
- KMS: A KMS key hosted on GCP, AWS, Azure, Hashicorp or OpenBao
- Tink: A secure KMS-encrypted Tink keyset created with tinkey
- PKCS#11: This works with any PKCS#11 devices including AWS CloudHSM, softHSM and others
- Google CA Service: A GCP-hosted certificate authority
- Files: An on-disk password-protected private key
- Ephemeral (for testing): An in-memory key pair generated on start up
See Setting up a Fulcio instance for more details.
6 — Certificate Transparency log inclusion
As part of certificate issuance, the certificate will be appended to an immutable, append-only, cryptographically verifiable certificate transparency (CT) log, which allows for issuance to be publicly auditable.
A special X.509 extension, called a poison extension, is included in the certificate before it is appended to the log. This certificate is called a precertificate, and is not yet usable by clients.
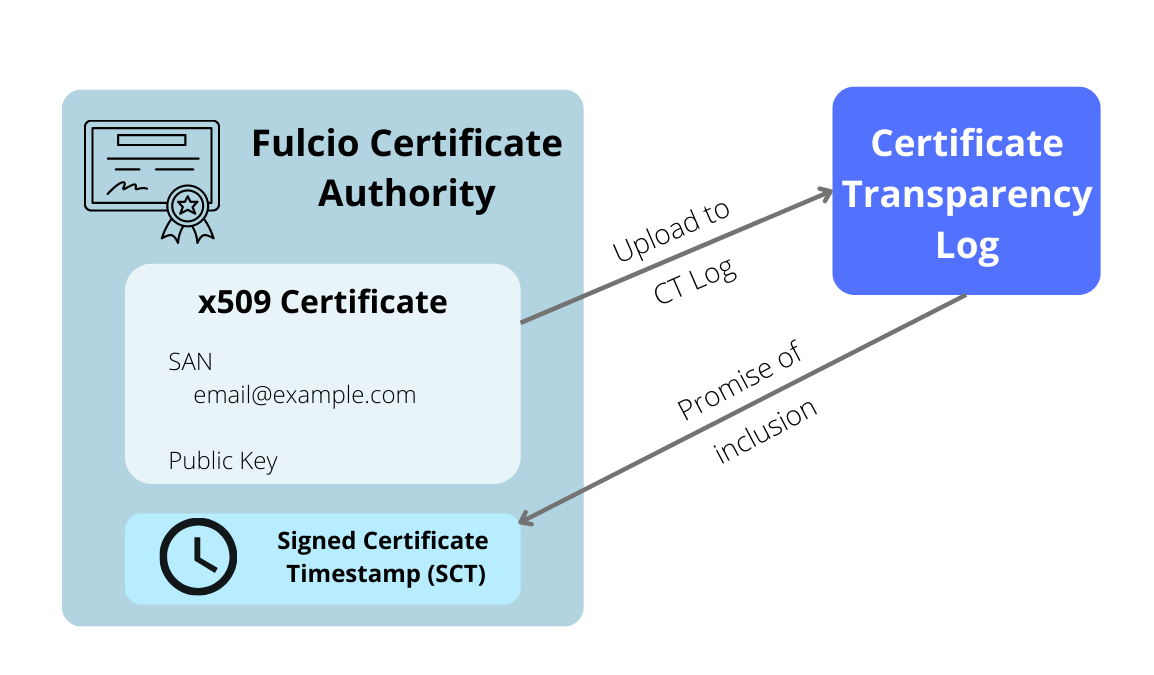
The certificate transparency log returns a Signed Certificate Timestamp (SCT). The SCT is a promise of inclusion in the log, signed by the CT log. It can be verified without accessing the log, though a client can also request a cryptographic proof of inclusion directly from the log.
The SCT is embedded within the certificate, and signed again.
Note that the Certificate Transparency (CT) log is separate from the Rekor transparency log. Fulcio’s CT Log only stores issued certificates, while Rekor stores artifact signatures and attestations.
See Certificate Transparency Log Information for more details.
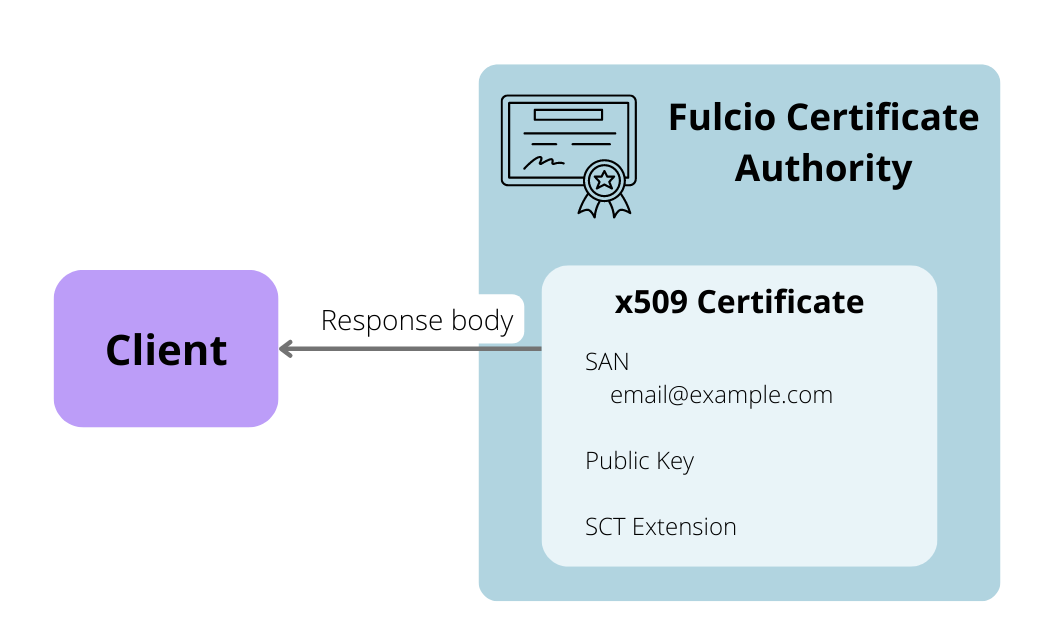
7 — Return certificate to client
Finally, the certificate and SCT are both returned to the client.